A practical guide to choosing the right RV internet setup for full-time travel, remote work, and life beyond campground Wi-Fi.

In This Article
-
Choosing the right RV Wi-Fi source (cellular, satellite, or campground Wi-Fi)
-
Configuring your router or hotspot for the first time
-
Securing your network and keeping firmware updated
-
Adding external antennas or signal boosters
-
Optimizing device placement inside your RV
-
Troubleshooting common RV Wi-Fi problems
-
FAQs
RV Wi-Fi setup entails choosing, installing, and configuring the internet hardware and software that helps you stay connected while traveling. Whether you're a weekend camper who wants to stream a movie at the campsite or a full-time digital nomad running video calls from a national forest, a solid RV Wi-Fi setup is what stands between you and a reliable connection.
To set up RV Wi-Fi, you’ll need to choose an internet source (cellular hotspot, router, or satellite), power on and configure it, secure it, and optimize placement near a window or with an external antenna. We’ve found that most RVers get the best results from a cellular router paired with a pay-as-you-go data plan.This guide walks you through the process step by step—from picking the right internet source to configuring your router, securing your network, and troubleshooting the problems that inevitably pop up along the way.
TL;DR
Most RV Wi-Fi setups rely on cellular internet delivered through a router or hotspot—pick your source, plug in the device, change the default password, and you're online. From there, it's about optimization: positioning your device near a window, adding an external antenna if your signal is weak, and keeping firmware updated. Signal boosters can help in fringe-coverage areas, but they won't create signals where none exist. When things go wrong, most issues trace back to placement, tower congestion, or outdated software—all fixable without a tech degree.
Experts Who Contributed to This Guide
-
This article was written by Amanda Capritto, a full-time vanlifer who has used several RV Wi-Fi setups to work remotely while living on the road.
-
This article was updated by Lauren Keary, a freelance writer and editor specializing in travel and connectivity content.
-
Jeff Gwinnell, TravlFi connectivity specialist, contributed expertise and reviewed this article for accuracy.

Step 1: Choose the Right RV Wi-Fi Source
Before you start plugging things in, you need to decide where your internet is actually going to come from. There are a few main options, and most experienced RVers end up using a combination depending on where they're parked and what they need to do online.
RV Wi-Fi Setup Options Compared
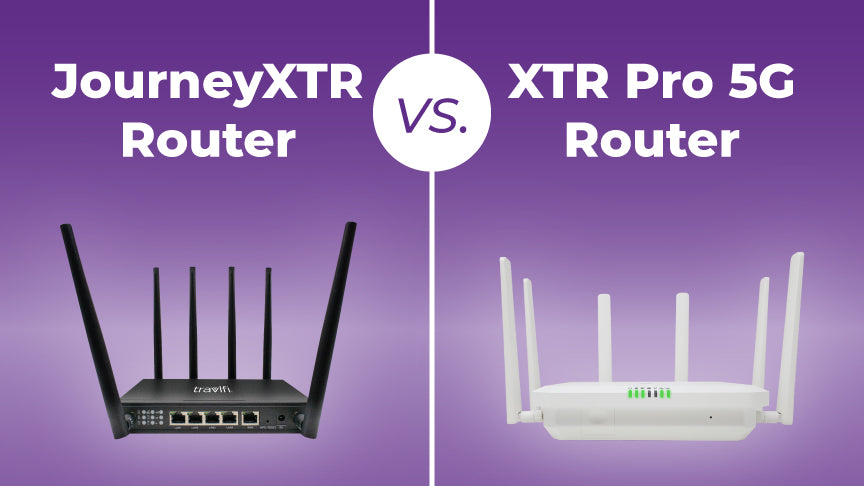
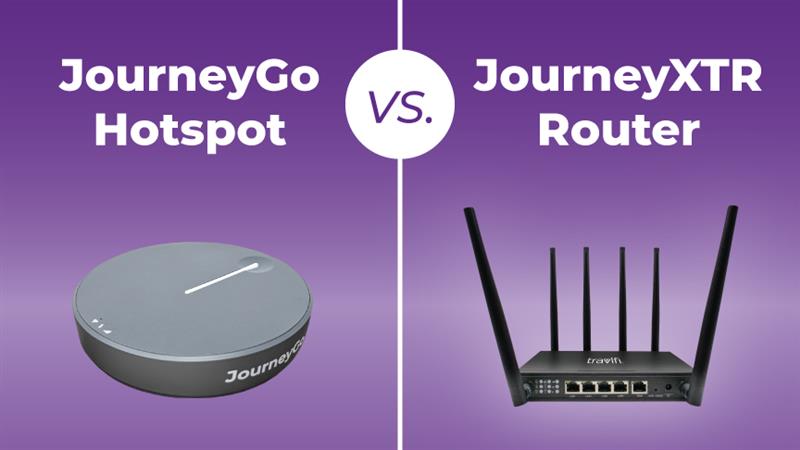
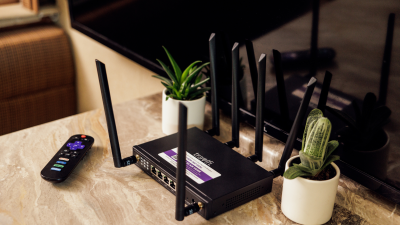
Cellular internet is the most popular choice for RVers, and for good reason. It connects to the same cell towers your phone uses, which means you get coverage across most of the country without any special installation. A dedicated mobile hotspot (like the TravlFi JourneyGo) provides a private connection without needing to install a router—just power it on and connect your devices. Routers (like TravlFi's JourneyXTR or XTR Pro 5G) support more devices, offer more powerful connections, and can be paired with an external antenna for improved performance. Many full-timers start with a hotspot and upgrade to a router as they build out their rig.
Satellite internet—most notably Starlink—works in remote areas where cell towers don't reach. It's a solid backup, but the equipment is bulkier and the costs are higher. Most setups only work while parked, though the Starlink Mini does support in-motion use when paired with a Roam plan ($50+/month). For a head-to-head breakdown, check out our TravlFi vs. Starlink comparison.
Campground Wi-Fi is free (or included with your site fee), but don't count on it for video calls, streaming, or consistent remote work. The connection is shared, and speeds tank when the campground fills up.
|
Cellular (Hotspot/Router) |
Satellite (e.g., Starlink) |
Campground Wi-Fi |
|
|
Coverage |
Wherever there's cell signal |
Remote/off-grid areas |
Campground only |
|
Speed |
Up to 150 Mbps (4G) / 3,600 Mbps (5G) |
50–200 Mbps typical |
Highly variable |
|
Setup |
Plug-and-play or simple install |
Dish setup required |
No setup |
|
Cost |
Pay-as-you-go plans available |
Starting at $50/month + equipment |
Free or included |
|
Best for |
Most RVers, remote workers, full-timers |
Boondockers, off-grid travelers |
Light browsing, email |
|
Works while driving |
Yes (cellular) |
Limited/no (most setups) |
No |
What's the Best RV Wi-Fi Setup?

The answer, as is often the case with travel-related questions, is: "It depends."
More specifically, the best RV Wi-Fi setup for you depends on your travel style—where you travel, how frequently you travel, and whether or not you're working part- or full-time on the road.
If you're a full-time vanlifer who works while traveling, for instance, you'll probably need a multi-part Wi-Fi setup with different types of connections. But if you're a retiree who mostly stays in campgrounds and doesn't need to worry about work, you can get away with a less expensive, simpler setup—in most cases, your phone hotspot will probably suffice.
Our guide to RV Wi-Fi options can help you determine which type of setup will work best for your rig and travel style.
Step 2: Configure Your Router or Hotspot
Once you've picked your internet source, getting your device online is usually the easiest part. For most cellular hotspots and routers, you typically just power them on, and they'll automatically search for the strongest available network.
For a hotspot like the TravlFi JourneyGo, that means charging the battery, turning it on, and connecting your laptop or phone to the Wi-Fi network printed on the device label. That's it. You're online.
For a router like the TravlFi JourneyXTR or XTR Pro 5G, setup involves plugging it into an AC power source (most RVers use a standard outlet near their desk or entertainment center), waiting for it to boot, and connecting your devices. If you want to use a wired connection—and Gwinnell recommends it when possible—plug an Ethernet cable from the router's LAN port directly into your laptop.
“A physical connection can drastically improve video quality, streaming, and download performance,” Gwinnell says. “Utilizing an Ethernet LAN (Local Area Network) port creates the most reliable physical connection, optimizes the available bandwidth, and prevents connections from being bogged down by potential Wi-Fi nuances.”
If your router has a companion app or web-based admin panel, take a few minutes to log in and look around. This is where you'll manage your network name, password, connected devices, and firmware updates—all of which we cover in the next few steps.
Step 3: Change Default Names and Passwords
“Out of the box, change all Wi-Fi connection names (SSID) and passwords to a unique combination of letters, characters, and numbers,” Gwinnell urges. If possible, change the default admin username and password, too. Make a note or use a password manager app to retain this information.
This isn't just a nice-to-have—it's a real security issue, especially when you're parked in public campgrounds or rest stops.
“Always keep Wi-Fi connections locked down. Open networks are a huge security risk, especially if you're mobile and traveling,” Gwinnell says.
A strong password doesn't need to be impossible to remember. A phrase with a few numbers and a special character works well—something like "Rv-Road2026!" is far better than leaving it as "admin/password." For more on keeping your rig secure, see our guide on how to make your RV more secure.
Step 4: Check for Software Updates
This is easy to forget to do, but can make a big impact on Wi-Fi speeds and stability.
“Keeping your device up to date means not only will it have the latest bug fixes, but important security patches and device improvements, too,” says Gwinnell. “Check with your device manufacturer online for product updates. If the device has a built-in update service, check for updates a few times a year.”
Most routers let you check for updates through the admin panel or companion app. Hotspots may require connecting to a computer and visiting the manufacturer's website. Either way, it's a five-minute task that can save you hours of headaches down the road.
Step 5: Add External Antennas or Boosters
If you're getting a signal but it's weak or inconsistent, external hardware can help—but it's not a magic fix.
Cell boosters refine and improve existing signal quality, which can be beneficial in areas where you have some coverage but it's inconsistent. They amplify what's already there, so if there's zero signal, a booster won't help.
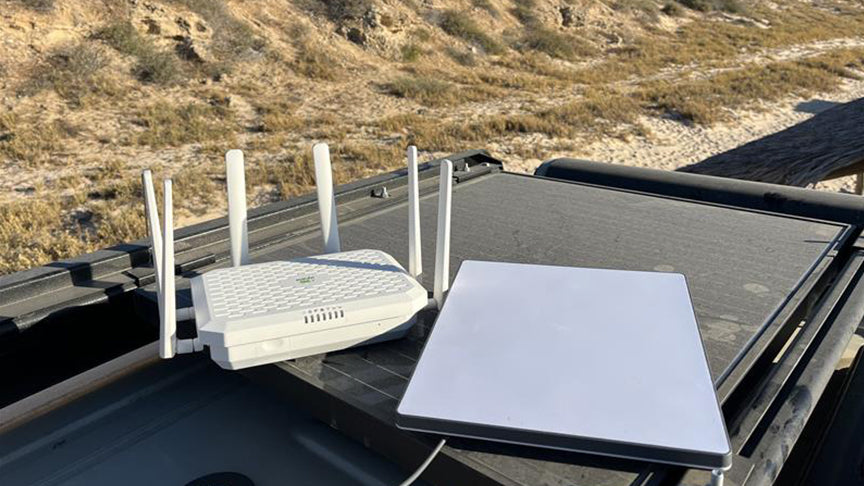
External antennas, which are installed on the outside of your RV, provide a better method for transmitting and receiving cell signal, Gwinnell explains. If you already have one, a larger one may improve signal further.
“If you are considering an external antenna or already have one, place your external antenna as high up as possible to overcome interference and give the antenna the best shot at sending/receiving cell signal,” Gwinnell says. “Also try a cell tower locator app or research your area before traveling and determine the best coverage locations.”
For TravlFi users, the JourneyXTR External Antenna with Mounting Plate is designed specifically for the JourneyXTR router.
Step 6: Optimize Placement
Sometimes, achieving a stronger connection simply requires moving your device around.
“If possible, keep the device out in the open and near windows or in a direction where signal is strongest,” Gwinnell says. You can also try moving the device around inside the RV, or relocating your RV if that's an option.
Keep your router or hotspot away from other electronics that could cause interference—microwaves, baby monitors, and Bluetooth speakers can all compete for signal. And don't stuff your device inside a closed cabinet or drawer. Electronics generate heat, and they need airflow to perform well.
“Keeping temperatures under control will improve device performance and maintain the lifespan of the device,” Gwinnell says. “It can often be difficult making the best use of storage in an RV, but don't operate your device in a junk drawer or a cabinet jam-packed with clothing.”
“Just as well, don't allow items to block vents/ports,” he continues. “If a device has provisions for mounting on a surface or wall, consider mounting the device in a good location for airflow and keeping the vents clear.”
Additional RV Wi-Fi Setup Tips
Once your core setup is running, these extra moves can squeeze more performance out of your connection.
-
Balance the Wi-Fi load: If your cellular device supports dual-band Wi-Fi, don't put every device on the same connection, says Gwinnell. “Try to separate devices that need high speed on 5GHz Wi-Fi (such as TVs, laptops, and tablets) and connect lesser priority devices (like IoT monitoring devices and cameras) on 2.4GHz Wi-Fi,” he says. “This can reduce some instances of interference and allows the devices with 5GHz Wi-Fi to attain their maximum performance.”
-
Separate IoT onto its own network: IoT, or Internet of Things, refers to everyday items that have sensors and communicative features—like cameras, tank monitors, temperature sensors, and refrigerators. Gwinnell recommends creating a password-protected guest Wi-Fi network and putting all of your IoT devices on that network. “This will help add another layer of separation between you and your IoT devices while still allowing internet access.”
-
Enable QoS. “If you're extra tech savvy, configuring QoS or ‘Quality of Service’ to prioritize bandwidth to certain web services can make the best of your connection,” Gwinnell says. Doing so involves a relatively complex process, but if you're up for it, it can preserve connection quality when it matters most—such as during a video call for work.
-
Pre-download entertainment and maps: If you're going on a short trip, download music, movies, and books ahead of time. This saves data while traveling, since those large downloads were already completed on your home network.
-
Self-monitor data usage: Utilize built-in data usage and metering functions within your cellular device or computer, Gwinnell recommends. For applications like streaming that use a large amount of data, consider turning down the resolution. “High-resolution streaming, downloading files, and gaming are the highest users of data,” Gwinnell points out. “Turn down the resolution, resist gaming if you can, and be conscious of what you're downloading.” Learn more about how long 200GB of data lasts.
-
Disable Wi-Fi on idle devices: One thing many people forget, Gwinnell says, is to disable Wi-Fi on devices they aren't using. “Smart-enabled devices like TVs, game consoles, streaming sticks, and more can consume data even when powered down or in standby mode.”
-
Get an unlimited data plan: If finances allow, an unlimited data plan is the best-case scenario for full-time travelers who work from the road.
RV Wi-Fi Troubleshooting
Even the best RV Wi-Fi setup hits snags. Here's how to diagnose and fix the most common issues.

How do I reset my RV router?
Start with a soft reset: power the device off, wait 30 seconds, and turn it back on. This forces the router to search for a fresh cell signal and re-establish its connection, which can help if the device is still connected to a tower that's no longer in optimal range.
“You can power a cellular device off and on to force another search of signal and re-connection,” Gwinnell says. “This can help if the device is still connected to a tower that is not within the best range.”
If a soft reset doesn't work, most routers have a small pinhole reset button that restores factory settings. But remember, a factory reset wipes your custom network name, password, and any other settings you've configured, so you'll need to set those up again.
Why does my RV Wi-Fi work outside but not inside?
The structure of your RV is probably the culprit. Metal siding, insulated walls, and low-E window coatings can all block or weaken cell signal as it passes through to your device inside.
“The structure of the RV or the vehicle can also play havoc with receiving and transmitting cell signal,” Gwinnell says. Nearby buildings or larger vehicles blocking the line of sight to a nearby tower can interfere, too.
The fix: mount an external antenna on the roof of your RV to capture the signal outside, then route it to your router inside. Placing your router near a window on the side facing the nearest cell tower can also help.
Why is my RV Wi-Fi so slow?
Slow RV Wi-Fi usually comes down to one of a few factors: you're too far from the nearest cell tower, the tower is congested with too many users, or your device isn't positioned well inside your rig.
Gwinnell explains that internet speed in an RV “is all subjective to the environment and number of users in the area. If the area is packed with people and users, you're not the only one who will run into potential slow speeds or connectivity issues.”
His insider secret? Camp in the off-season or seek out lesser-known areas. Fewer people means less tower congestion and faster speeds for you.
Factors That Affect RV Wi-Fi Speeds
Understanding what degrades your signal can help you plan around it. According to Gwinnell, these are the biggest factors:
-
Proximity or distance to nearby cell towers: Distance has a direct effect on your overall signal strength, as towers can only reach so far. The signal will fade out over time and become unreliable.
-
Weather conditions: Heavy fog, heavy snow, and heavy rain can degrade the available signal.
-
Cell tower congestion: Heavy user traffic due to events or seasonal travel popularity, as well as limited tower installations, can crowd local tower capacity and cause a drop in signal strength and quality.
-
Service coverage areas: As best as the big cellular providers try, service for each network provider is not available everywhere. If your preferred carrier isn't in the area, service may be limited or non-existent. Multi-network devices like TravlFi routers help here—they automatically connect to the strongest available network rather than locking you into one carrier.
-
Geographical interference: “Mountainous regions are notorious for having poor signal reliability due to the terrain and access for cell tower placement,” Gwinnell says. “Valleys and dense forests can also play a factor depending on locations of towers.”
-
Man-made interference: In addition to natural obstructions, Gwinnell says that “the structure of the RV or the vehicle can also play havoc with receiving and transmitting cell signal.” Buildings or larger vehicles blocking the line of sight to a nearby tower can interfere, too.
FAQs About RV Wi-Fi Setup
What are the most common RV internet setup mistakes?
According to Gwinnell, the most common RV internet mistakes include not changing the default network names and passwords; leaving Wi-Fi networks open without a password; never checking devices for the latest software updates; and operating devices in areas with poor ventilation, which can lead to overheating.
Do I need a router for RV Wi-Fi?
A router isn’t required, but it’s strongly recommended for full-time RVers. Routers provide better range, support multiple devices, and create a more stable connection than phone-based hotspots.
Can I use RV Wi-Fi while driving?
Cellular routers and hotspots work while driving as long as there is network coverage. Satellite internet typically only works while parked unless you use specialized in-motion hardware, such as with the Starlink Mini.
Is campground Wi-Fi good enough for working remotely?
Usually not. Campground Wi-Fi is shared among many users and often struggles with video calls, large uploads, or consistent speeds.
What’s the best RV Wi-Fi setup for remote work?
A cellular router with a generous data plan is the most reliable option. Many remote workers add satellite internet as a backup for remote areas.
How much data do most RVers need per month?
Light users may need 30–50 GB per month. Full-time RVers who work remotely often use 150–300 GB or more, depending on video calls and streaming habits.
Will a signal booster give me internet if there’s no service?
No. Signal boosters only amplify existing cellular signals—they can’t create coverage where none exists.
Final Thoughts: RV Wi-Fi Setup
Getting your RV Wi-Fi setup right is an ongoing process of choosing the right gear, configuring it properly, and adjusting as you travel to new places. But once you've got a solid foundation in place, staying connected from just about anywhere becomes second nature.
A quick recap of what matters most: pick an internet source that matches your travel style, secure your network from day one, keep your firmware updated, and don't underestimate what a well-placed antenna or a simple device repositioning can do for your signal. For short trips, pre-downloading entertainment saves data. For full-timers, an unlimited data plan is worth the investment.
Your ideal setup might be a single hotspot or a multi-device configuration with a router, external antenna, and satellite backup. Either way, you'll figure out what works best by getting on the road and testing it yourself.
More Essential Reading for RVers:
-
4G vs. 5G for RVers: What’s the Difference and Which One do you Need?
-
Top Digital Nomad Jobs: Work From Anywhere With Portable Internet
Which TravlFi Device Is Right for You?
TravlFi keeps you connected on the road. Not sure which device is best for you? Compare below.

Ready to get connected on the road? Learn more about TravlFi devices and pay-as-you-go data plans.